

Last Updated: October 25, 2026
Quick Summary
To host clothing swap, set clear rules about item condition and participation limits, choose an accessible venue and 2-3 hour time slot, and organize clothing by category and size. Use an exchange system matched to your crowd size, open browsing for small groups, tokens for medium swaps, or timed rounds for large events.
- Americans generate over 81 pounds of textile waste per person annually, making clothing swaps an important way to extend garment lifecycles.
- Small swaps work best with 5-15 people using open browsing with a 1:1 cap of 3-5 items per person.
- Arrive 90 minutes early to set up displays, signage, fitting areas, and refreshment stations before guests arrive.
- Assign four volunteer roles: check-in and tokens, floor host, fitting-area attendant, and checkout and cleanup lead.
- Plan a 15-minute social period before browsing opens, then end with 15 minutes for cleanup and final conversations.
Table of Contents
- Why Host a Clothing Swap Event
- Define Your Clothing Swap Rules
- Choose Your Date, Time, and Accessible Venue
- Craft Your Clothing Swap Invitation Wording
- How Long Should a Clothing Swap Last
- Prepare Your Clothing Swap Event Checklist
- Run the Swap and Handle Leftover Items
- Building Community Through Your First Swap
- Frequently Asked Questions
Why Host a Clothing Swap Event
When you host clothing swap events, you create a community gathering where people exchange clothes they no longer wear.
Hosting a clothing swap event creates real impact: you reduce textile waste, help participants save money, and foster community around sustainable fashion.
I recommend starting small, five friends in your living room, though it can grow into a neighborhood event with 30+ participants. The core principle stays the same: make exchanging clothes easy.
The EPA reports that Americans generate over 81 pounds of textile waste per person annually, making clothing swaps an increasingly important way to extend garment lifecycles.
Define Your Clothing Swap Rules
Clear rules make swaps run smoothly. Without guidelines, you'll face confusion about what's acceptable, how many items people can take, and whether the exchange feels fair.
Item Condition and Cleanliness Standards
Set specific standards: items should be clean, free of stains, and without major damage.
My simple standard: would you wear this piece yourself? If you're hesitant, leave it out.
Require items to be freshly washed, musty clothing discourages participation.
Build a quick inspection step into drop-off: check cleanliness (no odors, pet hair, or visible soiling), function (zippers, buttons, and seams intact), and category fit.
Participation Limits and Exchange Mechanics
Decide how many items each person can bring and take home, then pick an exchange system that matches your crowd size.
Large swaps (40+ people): timed rounds. Divide browsing into rounds by group, a first round for early arrivals or volunteers, then open browsing.
Studies on community-based resource sharing show that clear participation limits increase repeat attendance and satisfaction. People feel valued when the exchange feels equitable.
Consider size restrictions too, for example, "bring up to three small items and two large items", to ensure variety and prevent shortages in popular sizes. Pair the limit with a size-inclusive layout: separate racks or tables for extended sizes, plus-size, and petite.
Different swap sizes call for different exchange systems to keep things fair and organized.
| Swap Size | Participant Count | Exchange System | Item Cap |
|---|---|---|---|
| Small | 5-15 people | Open browsing with 1:1 cap | 3-5 items |
| Medium | 15-40 people | Token or ticket system | Set per participant |
| Large | 40+ people | Timed rounds by group | Set per round |
Choose Your Date, Time, and Accessible Venue
Pick a date when most of your target participants are available. Weekends work well for community swaps; weekday evenings can work for local professionals.
Aim for a 2-3 hour event window so people can browse, chat, and make selections without the event dragging on. Morning swaps (10 AM-1 PM) draw a different crowd than evening ones (6 PM-9 PM).
Your venue should be accessible and comfortable. A community center, church basement, library meeting room, or spacious home all work. Make sure there's:
- Enough floor or table space for clothing display
- Good lighting so people can see colors and details accurately
- A comfortable temperature (not too hot or cold)
Avoid cramped spaces, swaps need room to move, browse, and try things on.
Craft Your Clothing Swap Invitation Wording
Your invitation sets the tone and communicates what to expect. Keep it warm and clear. Here's a template you can adapt:
You're invited to a clothing swap! Bring gently used pieces you no longer wear and leave with items you'll actually use.
Date: [Date]
Time: [Start time]-[End time]
Location: [Venue name and address]
What to bring: 3-5 clean clothing items in good condition (no stains or major damage)
What to expect: Browse, swap, and connect with others who love sustainable fashion
RSVP by: [Date]Questions? Reach out to [your contact info].
Send invitations at least two weeks in advance via email, text, or social media, and include the address and parking details.
Mention the sustainability angle if it resonates with your group. Many participants are drawn to swaps because they align with their values around conscious consumption. Frame it as you can find on the Ethical Consumerism Guide about shopping with purpose to deepen that connection.
How Long Should a Clothing Swap Last
Most events to host clothing swap gatherings run 2-3 hours, enough time to arrive, browse, make exchanges, and chat without feeling rushed.
For a smaller gathering (5-15 people), 2 hours is usually enough, everyone can see all the items without waiting in lines.
Larger swaps (20+ people) benefit from the full 3 hours, since more participants mean more browsing time and some will arrive later.
Prepare Your Clothing Swap Event Checklist
Organization before the event determines how smoothly it runs on the day. A solid checklist keeps you from forgetting critical details.
Before the Event: Collection and Organization
Start collecting items 2-3 weeks before the swap. Ask participants to bring pieces early or set a specific drop-off deadline, giving you time to sort before the event day.
Sort clothing by category:
- Tops (shirts, blouses, sweaters)
- Bottoms (pants, skirts, shorts)
- Dresses
Within each category, organize by size. This makes browsing fast and intuitive. People can head straight to their size instead of flipping through everything.
Inspect each item as it arrives and gently reject anything stained, damaged, or unclean: "This has a stain I didn't notice.
Day-of Setup and Supplies
Arrive at least 90 minutes before guests.
Create clear signage for each section. A simple sign that says "Tops-Medium" or "Dresses-Large" helps people navigate quickly.
Set up a small refreshment area with water, coffee, or light snacks to encourage people to linger and chat.
Have supplies on hand:
- Extra hangers (always bring more than you think you need)
- A mirror or two for trying things on
- Bags or boxes for people to carry their selections
Create a comfortable fitting area with a screen or curtain for privacy if space allows. Even a simple corner works.
Run the Swap and Handle Leftover Items
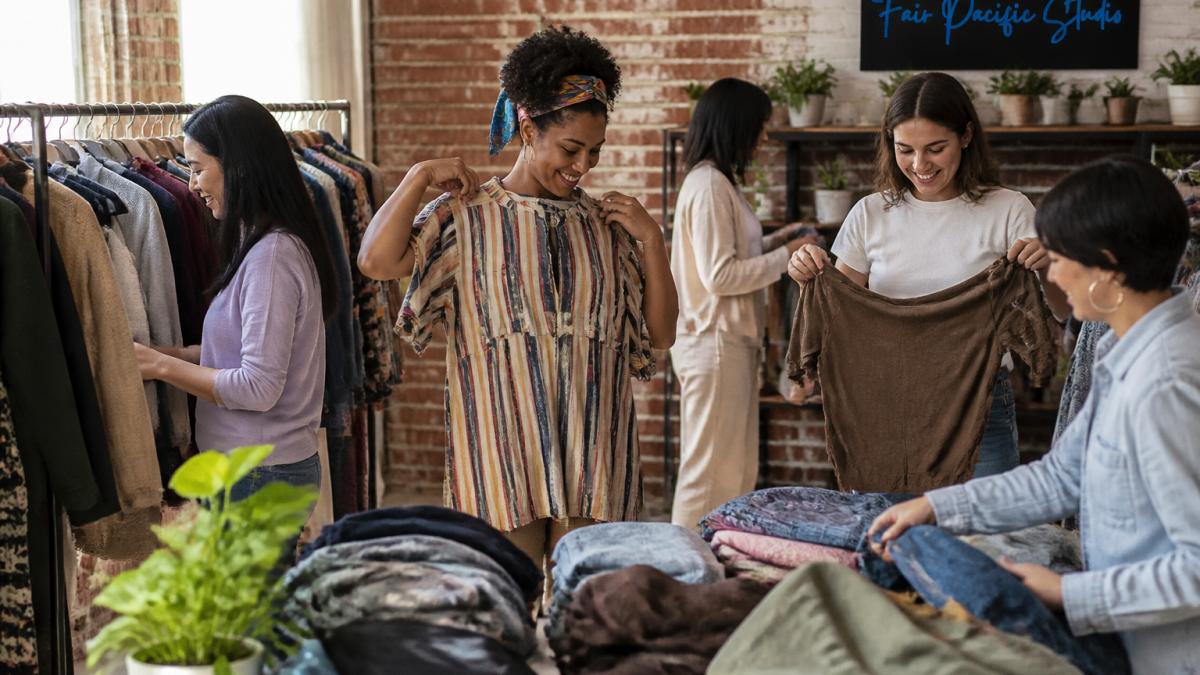
The event day runs on a timeline and a small team, most first-time hosts underestimate both. Here's the plan I'd use for roughly 20-40 people; scale the volunteer count but keep the roles.
Event-Day Run of Show
A run-of-show is just a written schedule you share with your helpers so everyone knows what happens when. Print it and tape a copy behind the check-in table.
- 90 minutes before doors: setup crew arrives. Racks and tables positioned, signage posted, fitting area screened off, refreshment table stocked, check-in table staffed with tokens, sign-in sheet, and the repair-or-donate box.
- 30 minutes before doors: all clothing sorted into labeled sections by category and size. Walk the room once as if you were a guest, if you can't find the dresses in 30 seconds, fix the signage.
- Doors open, first 15 minutes: welcome and a 2-3 minute orientation. Explain the exchange system, the item cap, where the fitting area is, and when the second-look round happens. Keep it short; people came to browse.
Staffing and Volunteer Roles
You need four roles for a mid-size swap, and one person can cover two roles at a small one:
- Check-in and tokens: greets guests, inspects items at drop-off, hands out tokens, keeps the sign-in sheet.
- Floor host: circulates, answers questions, re-sorts, and gently redirects crowding.
- Fitting-area attendant: keeps the privacy screen standing, manages a short line, and returns tried-on items to the correct section.
Brief volunteers 20 minutes before doors with the run-of-show in hand, a volunteer who knows the schedule needs far less supervision.
Safety, Hygiene, and Item Handling
A few practical habits keep the room comfortable without shaming anyone:
- Keep hand sanitizer at check-in and near the fitting area.
- Ask guests to try on over their own clothes where possible, and provide a mirror and a screened corner for anything more involved.
- Inspect items at drop-off, not on the floor. A piece that fails inspection goes quietly into the repair-or-donate box.
Handle Leftover Items
Have a plan for leftovers before the event ends. Options include:
- Donate them to a local thrift store or charity
- Invite participants to take extra items at the end (first-come, first-served)
- Save them for your next swap
Never throw away usable clothing, a swap's purpose is to keep clothes in circulation. Count items in, out, and donated so you can report the impact and plan the next event.
Take photos during the event to promote your next swap, and ask permission before photographing anyone.
Building Community Through Your First Swap
A successful first swap builds momentum. Pay attention to what worked and what didn't, comfort, space, timing.
Ask for feedback with a simple text or email: "What did you think?
Stay in touch between swaps with a group chat or email list.
Host your next swap within 2-3 months while momentum is high, regular swaps become a tradition people look forward to.
Remember that each swap you host extends the life of clothing and reduces waste. You're creating a community practice around conscious consumption. Explore more about sustainable fabrics to help participants understand quality and durability when they're selecting items for future swaps.
Frequently Asked Questions
How do you set up a clothing swap event?
Start by choosing a date, time, and accessible venue with enough space for clothing racks, tables, and browsing. Define clear rules about item condition, quantity limits, and how the exchange works. Send invitations with specific details about what to bring and how many items participants can take home. Recruit volunteers for setup, sorting, and checkout. Arrange clothing by size, type, or category on racks or tables before guests arrive. Have a simple system ready, some swaps use a token or point system, while others allow one-for-one exchanges. Set up a refreshment station and clear signage to guide participants.
How many clothes should guests bring to a clothing swap?
This depends on your exchange system. A common approach is asking participants to bring the same number of items they plan to take home, typically 5 to 10 pieces per person. You can also set a maximum limit to keep the event manageable. Include this clearly in your invitation wording so attendees know what to expect. If you're using a points or token system, specify how many points or tokens each item is worth. Being explicit about quantity helps prevent confusion and ensures fair participation.
What should you do with clothes left over after a swap?
Decide on this before the event and communicate it to participants. Common options include donating unclaimed items to local charities, offering them at a pay-what-you-wish station, or letting volunteers take what they want. Some hosts keep a small selection for future swaps. Set up a designated donation area on event day so leftover items don't get mixed with the active swap. Partner with a local nonprofit or thrift store in advance if possible. Document what you donate for your records and to show participants where their contributions go, reinforcing the sustainability mission of the swap.
How does a fair clothing swap work for different event sizes?
For small swaps (under 20 people), a simple one-for-one exchange works well, bring one item, take one item. For larger events, use a token or point system: assign each item a point value based on quality and demand, then give each participant a set number of points to spend. This prevents popular items from running out quickly and ensures fairness. Another option is timed browsing rounds, give experienced shoppers 10 minutes first, then open it to everyone. Clearly explain your system in advance and have volunteers ready to answer questions on event day.
Hosting a clothing swap builds connection while reducing textile waste. Start with clear rules, a comfortable space, and thoughtful organization. Your first swap sets the tone for future events. Keep it simple, make it welcoming, and watch your community grow around shared values of sustainability and conscious choice. The clothes are just the beginning, the real value is the community you create.
